

Ever walked past another fake spider in the store aisle and thought, “There has to be a better way to decorate for Halloween”? You’re not alone. Most store-bought decorations are either overpriced, generic, or just don’t fit your home’s vibe.
That’s where Halloween decor DIY comes in. It’s not just about saving money — it’s about creating a space that feels personal, playful, and a little spooky, all without looking like everyone else’s front porch. With a few simple ideas, you can transform your home into a festive Halloween haven, impress guests, and even have fun while doing it.
DIY decorations let you control the mood, use what you already have, and add touches that feel genuinely yours — something a box-bought skeleton just can’t do.
Why DIY Halloween Decor Works
There’s something satisfying about decorations you make yourself. For starters, it’s much easier on the wallet. Instead of spending $50 on a plastic skeleton or a generic light-up pumpkin, you can often create something just as impressive with materials you already have at home — cardboard, jars, old sheets, or even scraps of fabric.
But it’s not just about saving money. DIY gives you total control over how your space looks. You decide whether your home will be spooky, whimsical, or somewhere in between. You can tailor decorations to fit your space perfectly — a tiny apartment shelf, a front porch, or a kid-friendly corner. Store-bought decor rarely adapts this way.
And here’s the kicker: people notice when something is handmade. I’ve seen guests stop, laugh, or ask questions about homemade tombstones or floating ghosts more than they did at expensive store-bought props. There’s a personality and charm in DIY that just can’t be mass-produced. It makes your decorations memorable, and honestly, that’s what Halloween is all about.
Planning Your Space Before Crafting
Before you pull out scissors, glue, or paint, take a minute to look at your home the way a guest would. Where do your eyes naturally land when you walk in? That’s usually where your Halloween decorations will have the most impact.
If you live in a small apartment, focus on one or two key areas — a windowsill, a shelf, or a corner of your living room. Overcrowding a tiny space with too many decorations can make it feel cluttered instead of festive. A single statement piece, like a floating ghost or a DIY lantern display, often makes a bigger impression than ten half-finished projects.
For houses with porches, entryways, or yards, you have more freedom to create drama outside. Think about how your decorations interact with natural focal points — the front door, stair railings, or garden beds. You can place larger DIY tombstones or hanging ghosts where they’ll instantly catch attention, without crowding indoor spaces.
Rental spaces come with their own challenges. Stick to removable adhesives, lightweight items, or freestanding decorations that won’t leave marks. Paper bats on the wall or a few strategically placed DIY lanterns can make your home feel festive without risking security deposits.
The key takeaway? Start small, plan around your space, and focus on areas that naturally draw the eye. That way, your DIY Halloween decor looks intentional and polished, even if it’s handmade.
Easy Mason Jar Lanterns
Mason jar lanterns are one of the simplest and most effective Halloween decor DIY ideas. They’re affordable, versatile, and instantly give any space a cozy, spooky vibe. Even if you’ve never crafted before, this project is almost foolproof.
What You’ll Need
- Empty mason jars (any size works)
- Acrylic paint (black, white, or orange)
- Painter’s tape or masking tape
- Small tea lights or LED candles
Step-by-Step Instructions
- Clean your jars: Remove labels and make sure jars are dry.
- Create your design: Use tape to block out shapes or faces on the jars. Simple triangles for eyes or jagged mouth shapes work perfectly.
- Paint the jars: Apply your paint over the jar. Don’t worry about perfection — uneven edges add a homemade charm.
- Remove the tape: Once the paint is dry, peel off the tape to reveal your spooky faces.
- Add lighting: Place a tea light or LED candle inside each jar.
Lighting Tips for Maximum Impact
The right lighting makes all the difference. Dim surrounding lights or place lanterns on a windowsill so the glow stands out. Using flickering LED candles adds movement, making your jars look almost alive.
Real-Life Example
I once made a set of mason jar lanterns for a small apartment shelf. I didn’t expect much — just a fun decoration. But when friends visited, they kept commenting on how “creepy and cozy” the jars felt. One friend even asked if I’d bought them from a boutique store. That’s the magic of DIY — small, simple projects can create a huge impression.
Floating Fabric Ghosts
Floating fabric ghosts are a fun, eye-catching addition to any Halloween decor DIY setup. They’re lightweight, move with the air, and are perfect for hanging indoors or outside. Plus, they’re super easy to make — even if you’re short on time.
Materials You’ll Need
- White fabric scraps (old sheets, pillowcases, or even napkins)
- Balloons
- String or thread
- Black marker or paint (for eyes, optional)
Step-by-Step Instructions
- Inflate the balloons: These will be the “heads” of your ghosts.
- Drape the fabric: Place a piece of fabric over each balloon, letting it hang evenly around the sides.
- Secure the ghost: Tie the fabric under the balloon with string. Trim any excess fabric if needed.
- Add a face (optional): Draw simple eyes or a spooky mouth with a black marker.
- Hang them up: Attach the string to the ceiling, a tree branch, or a hook. Adjust the height for a floating effect.
Last-Minute Success Story
One year, I realized the house felt empty just hours before a Halloween party. I grabbed some old sheets and a few balloons, whipped up three floating ghosts, and hung them in the living room. They were crooked, slightly uneven, and moved in the breeze from an open window. Guests kept commenting on how “creepy and fun” they looked. It’s proof that even last-minute DIY decorations can make a big impact.
Cardboard Tombstones With Personality
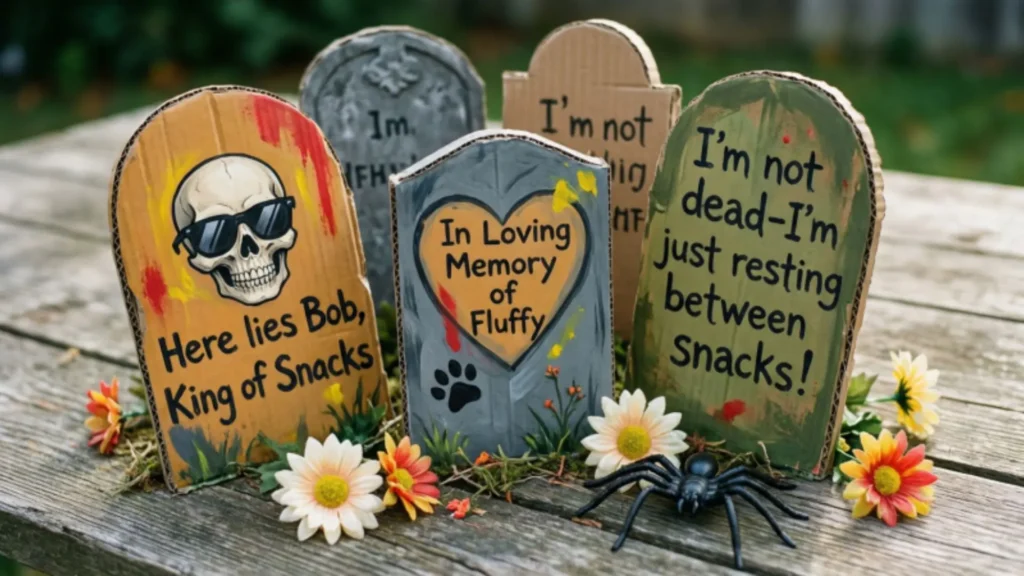
Cardboard tombstones are a classic Halloween decor DIY project — and they’re surprisingly versatile. You don’t need fancy materials, and they’re a perfect way to add humor and personality to your decorations.
Materials You’ll Need
- Cardboard boxes (flattened and cut into tombstone shapes)
- Marker, paint, or chalk
- Optional: glitter, stickers, or craft supplies for extra flair
Step-by-Step Instructions
- Cut your tombstones: Simple rounded tops or jagged edges work well. You don’t need perfection — slight irregularities make them look weathered and spooky.
- Add phrases or names: This is where you get creative. Funny, punny, or slightly sarcastic messages work great. Examples:
- “RIP Diet Plans”
- “Here Lies My Motivation”
- “Gone, But Still Watching”
- Decorate if you like: Add small drawings, fake cracks, or spider webs for extra effect.
- Place strategically: Lean them against walls, line them along a porch, or scatter them in a yard. Positioning matters more than perfection.
Observations From Real DIY Experience
In my experience, tombstones with humor or personality get the most attention. One year, I made a set with cheesy phrases like “RIP My Free Time” and “Here Lies My Alarm Clock.” Guests stopped, laughed, and even took photos — something that never happened with expensive plastic props.
The takeaway? Personality beats polish. Slightly imperfect cardboard tombstones feel more memorable than something mass-produced.
Paper Bats & Wall Decorations
Wall decorations are one of the easiest ways to make a home feel festive for Halloween — without spending much money. If you’re renting, you don’t want to risk holes or permanent marks. That’s where paper bats and other lightweight DIY pieces shine.
Materials You’ll Need
- Black cardstock or construction paper
- Scissors
- Removable adhesive (like poster putty or removable tape)
Step-by-Step Instructions
- Cut out bat shapes: You can draw freehand or use a template from online. Sizes can vary — some small, some large.
- Attach to the wall: Use removable adhesive so you won’t damage paint or wallpaper.
- Create movement: Don’t line them up perfectly. Place some higher, some lower, and angle a few as if they’re flying in different directions.
Placement Tricks for Maximum Effect
- Group a cluster in a corner to make it look like a swarm.
- Spread some across the ceiling near light fixtures to add depth.
- Mix in a few hanging ghosts or other lightweight decor for variety.
Real-Life Example
I once decorated a rented living room with a mix of paper bats and DIY ghosts. Instead of trying to make everything symmetrical, I let them hang at slightly random heights. The result? Guests kept glancing up and commenting on how “alive” the decorations felt. It looked much more dynamic than lining them in a straight row ever would have.
Pro tip: Less perfection = more personality. The goal is movement and life, not symmetry.
Creepy Picture Frames
Sometimes the smallest details make the biggest impact. Creepy picture frames are a subtle way to add Halloween vibes to your home without taking up floor space or looking over-the-top. They’re perfect for renters, apartments, or any room where you want spooky touches without clutter.
Materials You’ll Need
- Old portraits or printed vintage images (you can find free ones online)
- Inexpensive frames (thrift stores work great)
- Marker or paint for cracks or shading (optional)
Step-by-Step Instructions
- Select your images: Choose portraits with serious expressions, vintage family photos, or anything that looks a little mysterious.
- Optional spooky touches: Add cracks, dark shading, or subtle cobwebs with paint or marker.
- Frame the image: Place it in a simple frame — it doesn’t need to be fancy.
- Hang slightly crooked: This is the key. A perfectly level frame looks normal; a slightly tilted frame creates tension and makes the art feel eerie without being obvious.
Why Crooked Placement Works
From experience, crooked frames instantly create a subtle “something’s off” feeling. Guests may not consciously notice it, but it adds to the atmosphere. I once had three crooked frames on a hallway wall during a Halloween party, and multiple friends remarked, “There’s something weird about that wall… I like it.”
It’s a simple trick, but combined with other DIY decorations like paper bats or floating ghosts, crooked frames can make your space feel fully immersive — without expensive props or complicated setups.
Budget-Friendly DIY Using Household Items
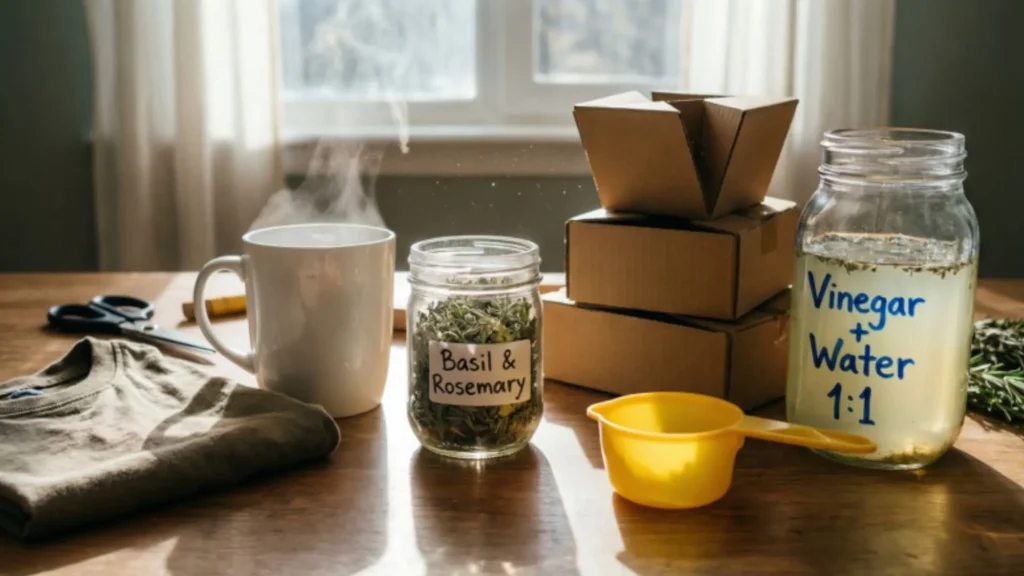
You don’t need to spend a fortune to make your home feel festive for Halloween. Some of the most memorable Halloween decor DIY projects come from things you already have lying around the house.
Materials You Can Repurpose
- Old sheets → ghosts, table covers, or draped fabric for a spooky corner
- Toilet paper rolls → tiny monsters, mummies, or skeleton arms
- Black trash bags → spiders, wall drapes, or makeshift tombstones
- Broken jewelry or beads → witchy table scatter or tiny “cursed” accents
Real-Life Example
One year, I realized I had almost no budget for Halloween. I grabbed a few old sheets to make floating ghosts, stacked some cardboard as tombstones, and added a few beads and broken costume jewelry to a tabletop for “cursed treasure.”
The result? Guests kept asking where I bought the decorations. No one guessed they were DIY on a shoestring budget — and that’s the beauty of creative, thoughtful repurposing.
Kid-Friendly DIY Halloween Projects
Halloween is even more fun when kids get involved, and the best part about Halloween decor DIY is that many projects are simple enough for little hands — but still look great to adults.
Fun & Easy Ideas
- Paper pumpkins: Cut out pumpkin shapes from construction paper and let kids color or decorate them with markers and stickers. Tape them on walls or windows.
- Handprint ghosts: Dip hands in white paint, press onto black or dark paper, and add eyes with a marker. Every ghost will be unique!
- Painted rocks: Collect smooth rocks, paint them with pumpkins, monsters, or spiders, and scatter them around your porch or tabletop.
Focus on Fun, Not Perfection
Kids will naturally make things crooked, uneven, or colorful in unexpected ways — and that’s part of the charm. One year, my niece made a series of “ghosts” with completely different shapes and sizes. They looked chaotic at first, but when I hung them together, the wall looked whimsical, spooky, and full of personality.
Tip: Let kids pick colors, designs, and placement. It adds personality, encourages creativity, and gives them ownership over the decorations — which makes Halloween even more memorable.
Pro tip: Lighting can make cheap materials look high-end. A candle or LED spotlight can turn simple sheets or cardboard into something dramatic and festive.
Common DIY Halloween Mistakes to Avoid
Even the simplest Halloween decor DIY projects can go sideways if you’re not careful. From personal experience, there are a few common mistakes that make things stressful — and less effective.
Over-Complicating Projects
Trying to create elaborate props with too many steps or supplies can turn a fun project into a frustrating marathon. Keep it simple. A few well-placed decorations always have more impact than dozens of unfinished or messy pieces.
Unrealistic Expectations
DIY doesn’t mean “store-perfect.” It means creative, personal, and imperfectly charming. Your floating ghost doesn’t need to glide like it’s in a professional haunted house — crooked edges and uneven faces add character.
Poor Lighting
Even the best DIY decorations can look flat without proper lighting. Dim lamps, candles, or LED lights can instantly elevate simple projects, while bright overhead lights may wash out the effect.
Too Many Projects at Once
Focusing on multiple big projects simultaneously often leads to half-finished decorations and stress. Start with one or two ideas, get them right, then build from there.
Remember: DIY is about having fun and creating a mood, not racing to recreate Pinterest-perfect setups. The more relaxed you are, the better your Halloween vibe will feel.
Lighting Tips for Halloween Decor DIY
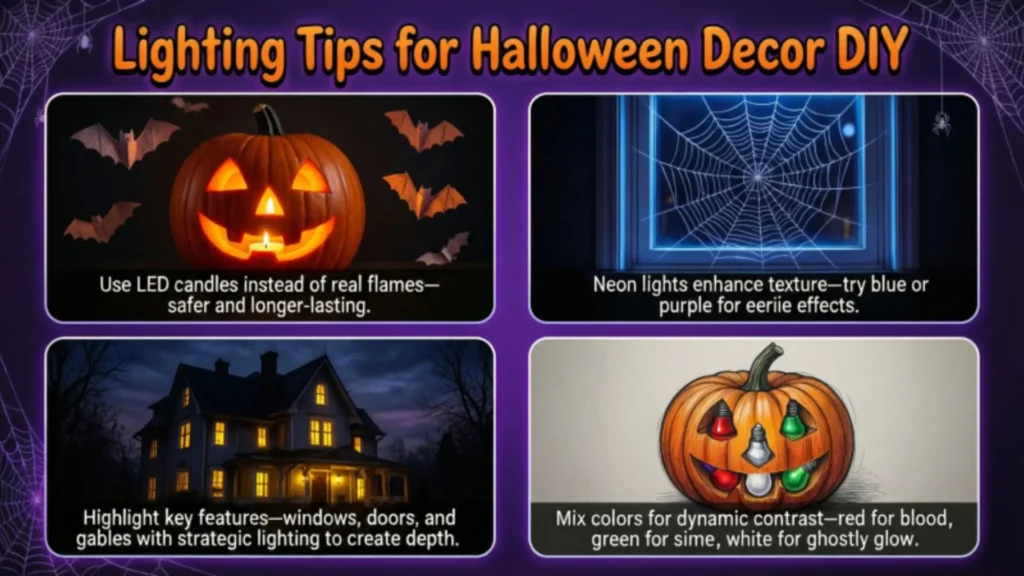
One of the easiest ways to make your Halloween decor DIY look impressive is with lighting — and you don’t need to spend a fortune. Proper lighting can turn simple, inexpensive decorations into something that feels dramatic and immersive.
How to Use Lighting Effectively
- Candles or LED tea lights: Perfect for mason jar lanterns, floating ghosts, or small tabletop displays. The flickering effect adds movement and makes even basic props feel alive.
- Dim lamps: Lowering ambient light instantly sets a spooky mood and draws attention to your DIY pieces.
- Warm bulbs: Soft, warm light is inviting while still maintaining a cozy Halloween vibe. Avoid harsh white lights that can wash out your decorations.
Cheap Materials + Good Lighting = Wow Factor
I once used nothing but white sheets for ghosts and a few inexpensive LED candles. Alone, the sheets looked like… well, sheets. But with the lights placed behind and around them, the ghosts appeared to float in midair, and guests kept asking how I created them.
Another example: simple cardboard tombstones on the porch with a small spotlight or candle at the base suddenly looked like a miniature graveyard — no fancy materials required.
Making DIY Decor Cohesive
One of the biggest challenges with Halloween decor DIY is making everything feel like it belongs together. Without a plan, even the most creative projects can end up looking chaotic or mismatched.
Choose a Theme or Color Palette
Decide on a vibe before you start:
- Spooky – blacks, grays, deep purples, and cobweb accents
- Cute Halloween – oranges, whites, and playful pumpkins or friendly ghosts
- Vintage – muted colors, antique-looking props, and old portraits
- Witchy – purples, greens, candles, and mystical accents
Once you stick to a palette, even simple DIY decorations like paper bats, mason jar lanterns, or cardboard tombstones feel intentional rather than scattered.
Lessons From Real Experience
I’ve mixed too many styles in the past — cute ghosts next to creepy skeletons and neon-colored pumpkins — and the result looked like “Halloween chaos.” Guests were amused, but it didn’t feel cohesive.
When I focused on one theme and color palette, even a handful of decorations transformed a space. Everything suddenly felt curated, spooky, and fun, without needing expensive props or complicated setups.
Mix of Spooky & Humorous Decor
Halloween doesn’t have to be all dark and scary — a little humor can make your Halloween decor DIY more memorable and fun. Adding personality to your decorations gives your home character and encourages guests to interact with your setup.
Ideas for Adding Personality
- Fun tombstones: Write playful or punny phrases on cardboard or foam tombstones.
- Cheeky signs: “Beware of the Cat” or “Zombie Crossing” are simple but effective.
- Playful props: Mini monsters, goofy ghosts, or mismatched decorations can bring a smile.
Real-Life Example
One year, I made cardboard tombstones with phrases like:
- “RIP My Free Time”
- “Here Lies My Alarm Clock”
- “Gone But Still Watching”
Guests couldn’t stop reading them. People laughed, took pictures, and even remembered the decorations weeks later. That’s the magic of mixing humor with spooky: it leaves a lasting impression without requiring expensive props or perfect crafting skills.
FAQs
What are some easy DIY Halloween decorations I can make at home?
You can make mason jar lanterns, floating fabric ghosts, paper bats, or cardboard tombstones with items you already have.
How can I decorate my apartment for Halloween without damaging walls?
Use removable adhesive, poster putty, or freestanding props like cardboard tombstones and mason jar lanterns.
What’s a budget-friendly way to make my home spooky for Halloween?
Repurpose old sheets, toilet paper rolls, black trash bags, or broken jewelry and pair them with candles or dim lighting.
How do I make DIY Halloween decorations look cohesive?
Stick to a single theme or color palette like spooky, cute, witchy, or vintage to make decorations feel intentional.
Can kids help with Halloween DIY projects?
Yes! Paper pumpkins, handprint ghosts, and painted rocks let kids contribute while adding fun and personality.
Conclusion
The best thing about Halloween decor DIY is that it doesn’t need to be perfect or overwhelming. Start small — one mason jar lantern, one floating ghost, one wall of bats — and see how it transforms your space.
Let your decorations evolve naturally over the season. Some ideas will work better than expected, others might flop, and that’s part of the fun. The point isn’t perfection; it’s creating a home that feels personal, playful, and memorable.
DIY decorations leave a mark that store-bought props can’t — they show personality, spark conversations, and make Halloween truly yours. Even simple, homemade touches can make your home feel festive, cozy, and delightfully spooky.